
[:es]
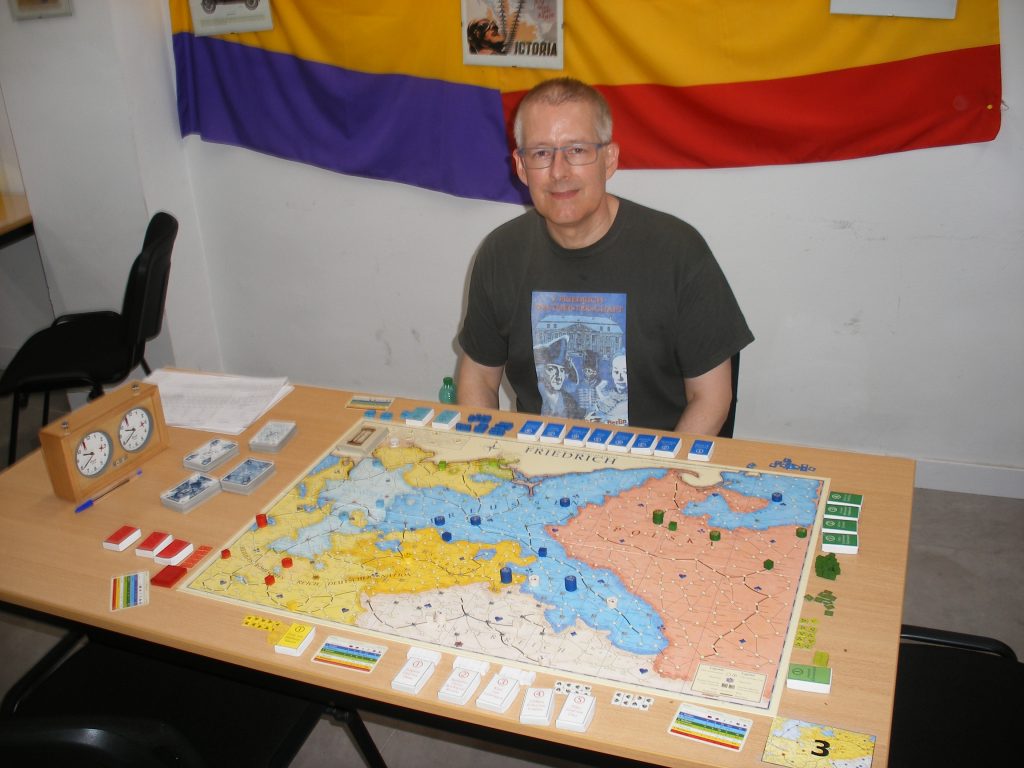
Tarde del domingo 18 de junio. El primer clasificado, Guy Atkinson, se sienta en la mesa de la final en el lado de Prusia.
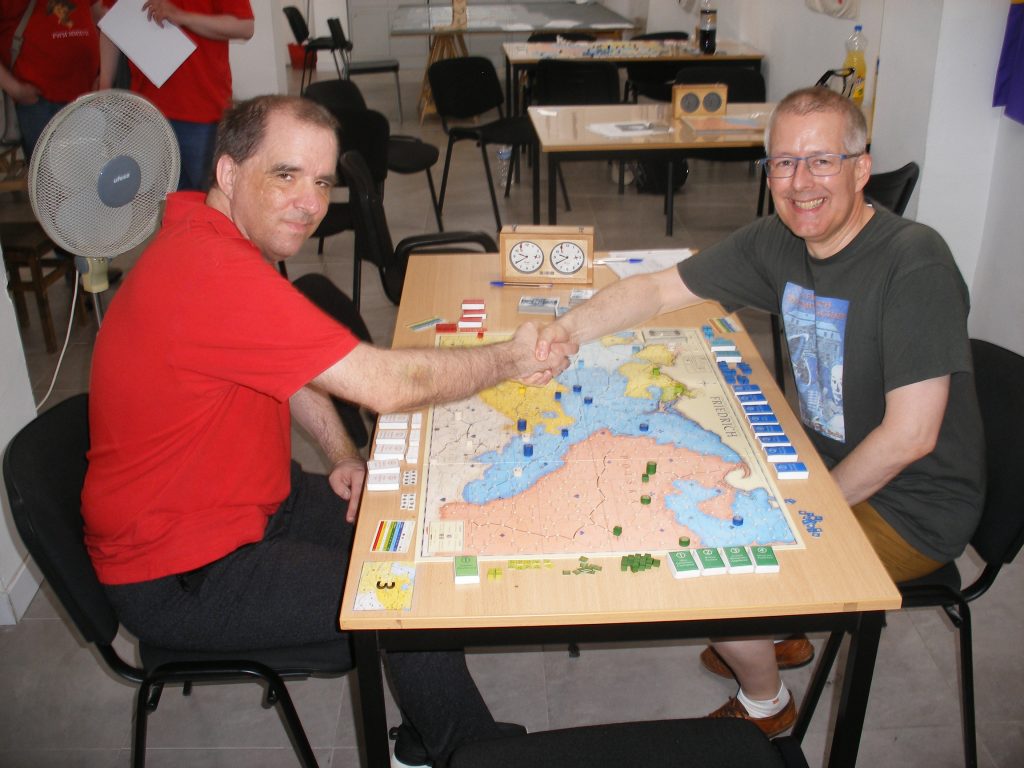
A continuación se sienta enfrente suya el segundo clasificado, Bjorn von Knorring, que jugará la final como Austria.
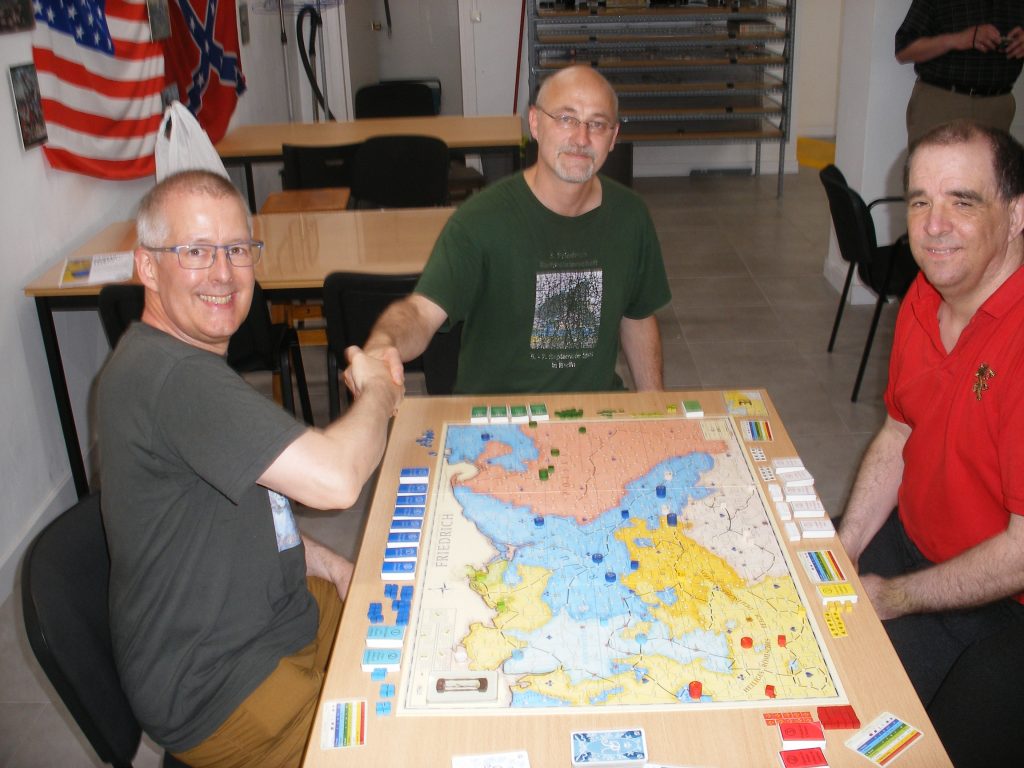
With them Richard Sivèl takes his seat on the Russian side of the table, after reaching the third place in the qualification rounds.
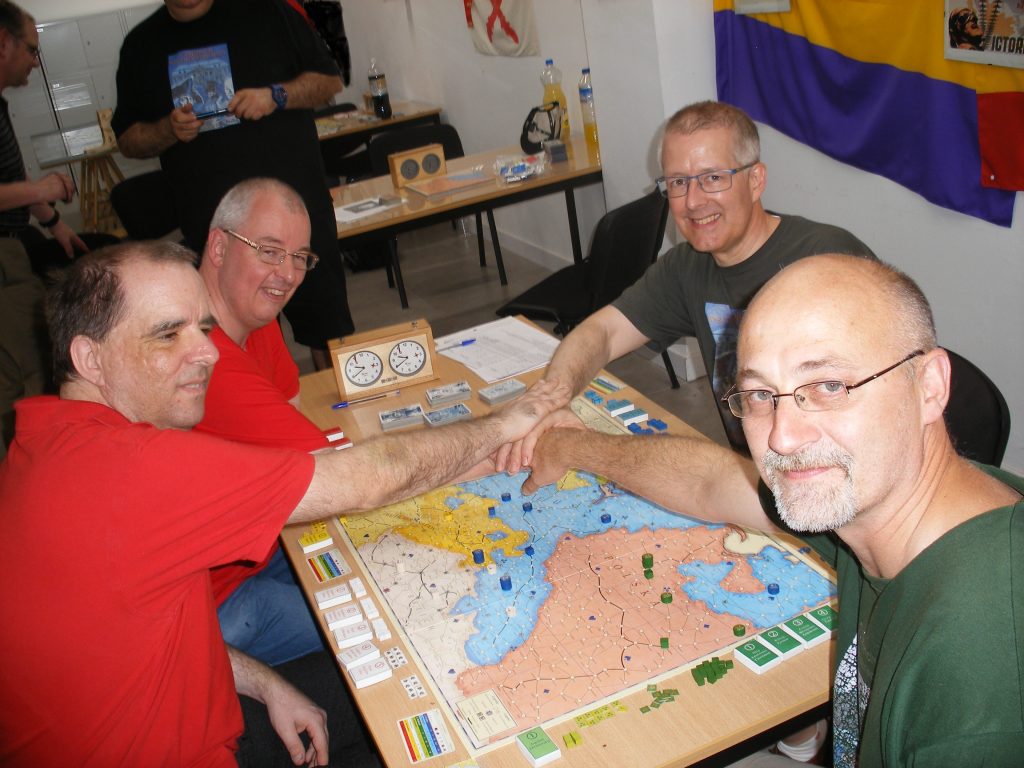
Y cierra la mesa el cuarto clasificado del campeonato, Maurice de Wijs, quien juega con Francia.
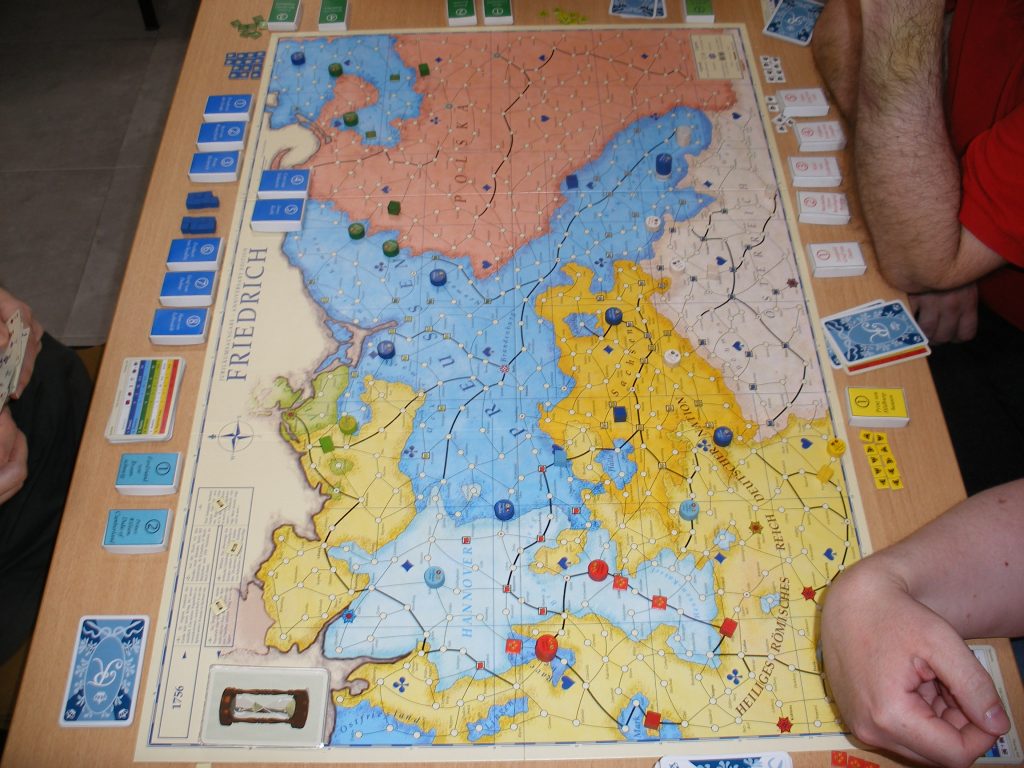
Situación al final del 2º turno. Heinrich (P3) ha subido desde Berlin y está a distancia suficiente como para unirse a Dohna (P7) cosa que hará el turno que viene, como veremos. Ante ellos, Rusia lleva a cabo un avance decidido tanto en Prusia Oriental como en Kammin. En Silesia Daun y Laudon (A1 y A4) tantearon a Schwerin y Keith (P4 y P5) en diamantes, y se retiraron tras una breve escaramuza. El resto de piezas austríacas avanzan en un frente amplio entre Silesia y Sajonia, mientras que Hildburghausen se las tiene que ver a solas con Winterfeldt (P2) y es empujado al borde sur del mapa. Francia avanza de forma decidida por las dos carreteras principales, pero al hacerlo ha dejado un hueco para que Cumberland (H2) se cuele hacia el sur y establezca uno de los pivotes de una “Defensa en Triángulo”. En el siguiente turno Maurice (Francia) contrarrestará esta jugada uniendo todos los generales franceses en la actual localización de Soubise (F2) e iniciará una persecución general de la pieza hanoveriana en el sur.
Es en este momento cuando se inicia la serie de jugadas entre Guy (Prusia) y Richard (Rusia) que marcará el rumbo de la partida y que conviene ver con más detalle.
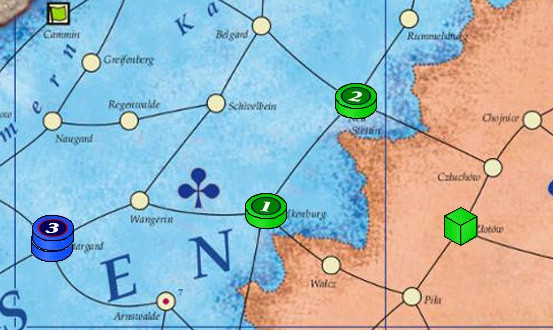
Comienzo del 3er turno tras el movimiento prusiano. Heinrich y Dohna unen fuerzas en Stargard para hacer frente a la invasión rusa.
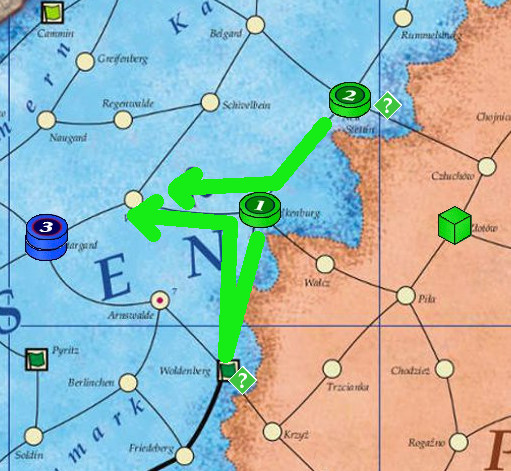
Movimiento ruso en el 3er turno. Saltikov y Fermor (R1 y R2) se unen en Wangerin para atacar a los prusianos, al tiempo que intentan conquistar Neu Stettin y Waldenburg.
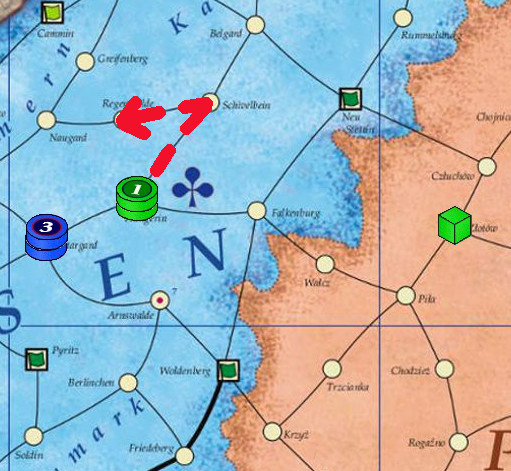
En la batalla que sigue hay un breve intercambio de cartas en tréboles, pero en cuanto Guy le ofrece a Richard una retirada de dos espacios, éste acepta inmediatamente. Sin embargo, y para su consternación, el espacio al que son retirados los generales rusos (Regenwalde) hace posible que estos sean fácilmente cercados en el siguiente turno.
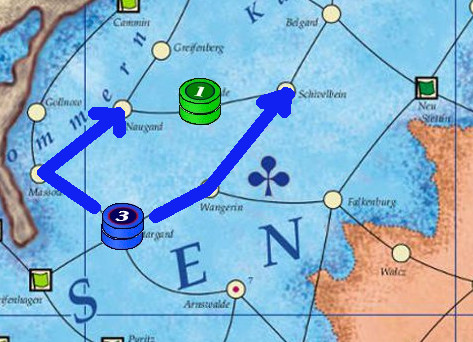
Los temores rusos se hacen realidad en el turno 4º de Prusia, cuando Guy mueve a Heinrich (P3) a Naugard y a Dohna hacia Schivelbein para hacer realidad el cerco que Richard estaba temiendo. ¡La batalla decisiva de la final está a punto de comenzar
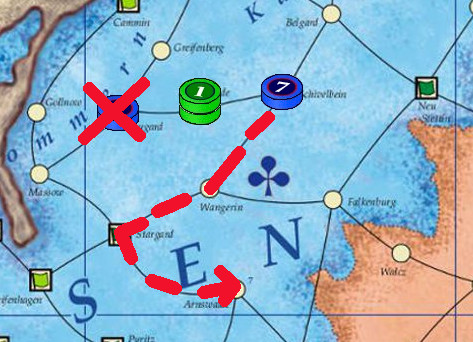
Desafortunadamente para Guy, no tiene el resultado que él se esperaba. El ataque es iniciado con Dohna (P7) con 8 tropas contra 10-11 tropas rusas. Pude ver la mano de cartas de Prusia en este momento, y no tenía muchas cartas de tréboles, siendo la más fuerte de 11 puntos y el resto mucho más débiles. Richard, en cambio, tenía entre las 12 cartas robadas por Rusia hasta ahora unas 5 cartas de tréboles de valores muy elevados, y una reserva. El resultado fue que Dohna tuvo que retirarse y Heinrich (P3) con una tropa fue eliminado inmediatamente.
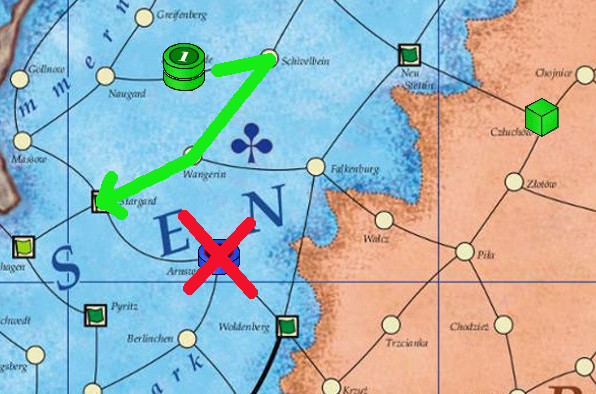
Richard remata la tarea en el 4º turno ruso atacando con sus 10-11 tropas rusas a las 5 de Dohna en Arnswalde. Guy carece de cartas para efectuar siquiera una retirada que salve a su general, y este es destruido totalmente.
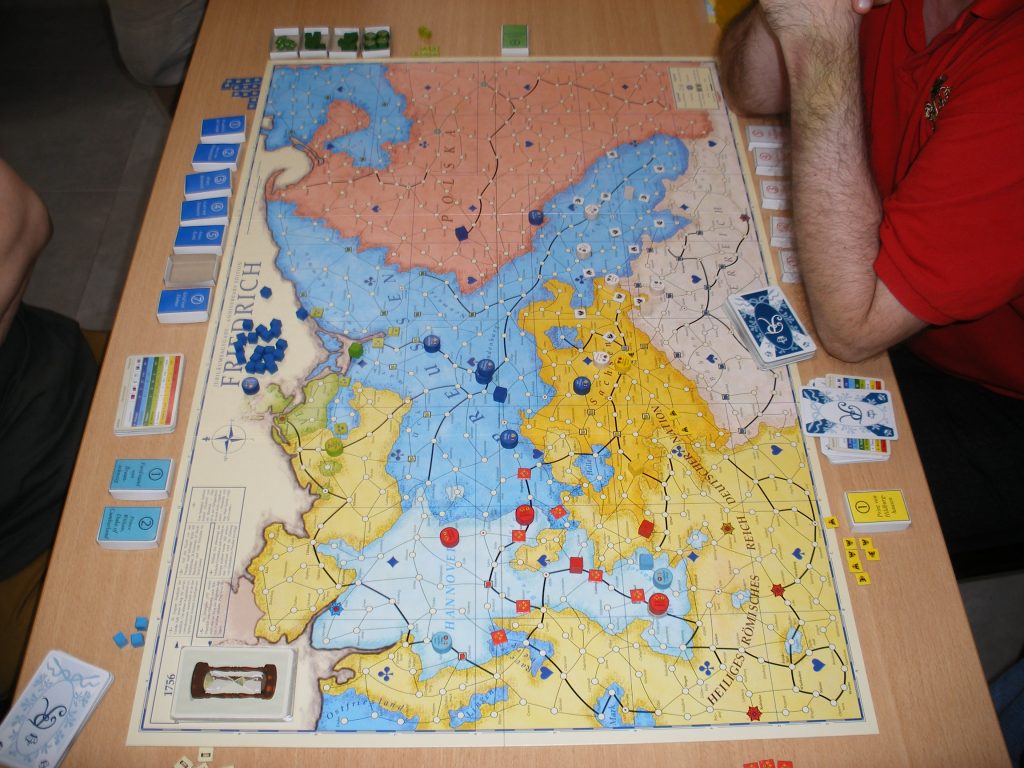
Vista general del final del 4º turno. Tras el descalabro frente a Rusia hay un alarmante vacío de piezas azules en el área norte del tablero (a la izquierda en la imagen) cuya consecuencia más alarmante es que nada puede impedir que Suecia conquiste todos sus objetivos primarios para el turno 6, justo cuando se comienza a leer la primera carta del destino ¡qué podría ser la muerte de la zarina!. En Prusia Oriental (esquina superior izquierda) Lehwaldt (P8) se mantiene en el tablero a pesar de que los rusos tienen conquistados todos sus objetivos allí. En Silesia, Schwerin y Keith (P4 y P5) defienden desde picas en Breslau. En Sajonia Prusia mantiene el predominio. En Hannover Soubise y Chevert (F2 y F3) dan caza a Cumberland (H2), mientras que Richelieu (F1) lanza una incursión en Sajonia persiguiendo el suministro hannoveriano. Seydlitz (P6) se mantiene vigilante en torno a Magdeburgo.
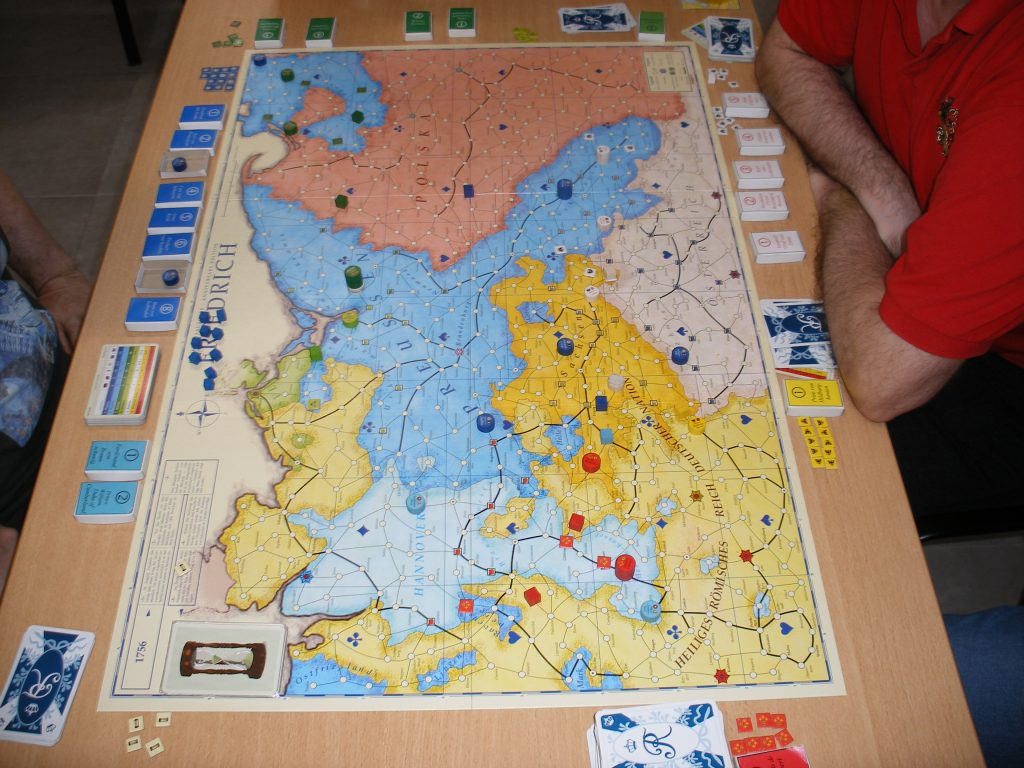
Vista general del final del 4º turno. Tras el descalabro frente a Rusia hay un alarmante vacío de piezas azules en el área norte del tablero (a la izquierda en la imagen) cuya consecuencia más alarmante es que nada puede impedir que Suecia conquiste todos sus objetivos primarios para el turno 6, justo cuando se comienza a leer la primera carta del destino ¡qué podría ser la muerte de la zarina!. En Prusia Oriental (esquina superior izquierda) Lehwaldt (P8) se mantiene en el tablero a pesar de que los rusos tienen conquistados todos sus objetivos allí. En Silesia, Schwerin y Keith (P4 y P5) defienden desde picas en Breslau. En Sajonia Prusia mantiene el predominio. En Hannover Soubise y Chevert (F2 y F3) dan caza a Cumberland (H2), mientras que Richelieu (F1) lanza una incursión en Sajonia persiguiendo el suministro hannoveriano. Seydlitz (P6) se mantiene vigilante en torno a Magdeburgo.
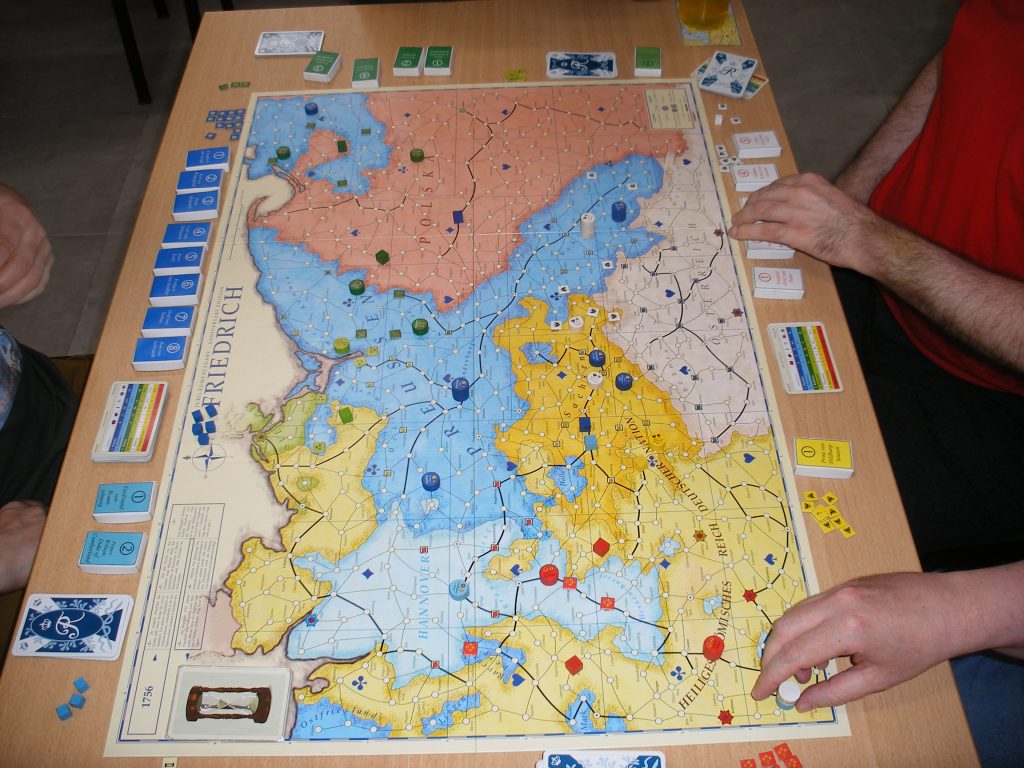
Final del turno 9. Guy ha tenido una serie muy intensa de combates contra Richard tanto en picas como en corazones. Tanto contra Rusia como contra Suecia. Esta imagen recoge un momento crucial porque es el momento en el cual Suecia ha logrado vía libre para retomar sus objetivos principales. Hay que observar como las piezas rusas están colocadas para abrir paso a su aliado menor. En el resto del tablero Austria y Prusia han combatido algo en Sajonia, pero en Silesia todo está bastante tranquilo. La torre de tres generales austríacos no se atreve a entrar en el sector de diamantes allí, como si Bjorn tuviera pocas cartas de ese palo. Al oeste Francia ha aprovechado el caos generalizado para tomar Magdeburgo y Halberstadt.
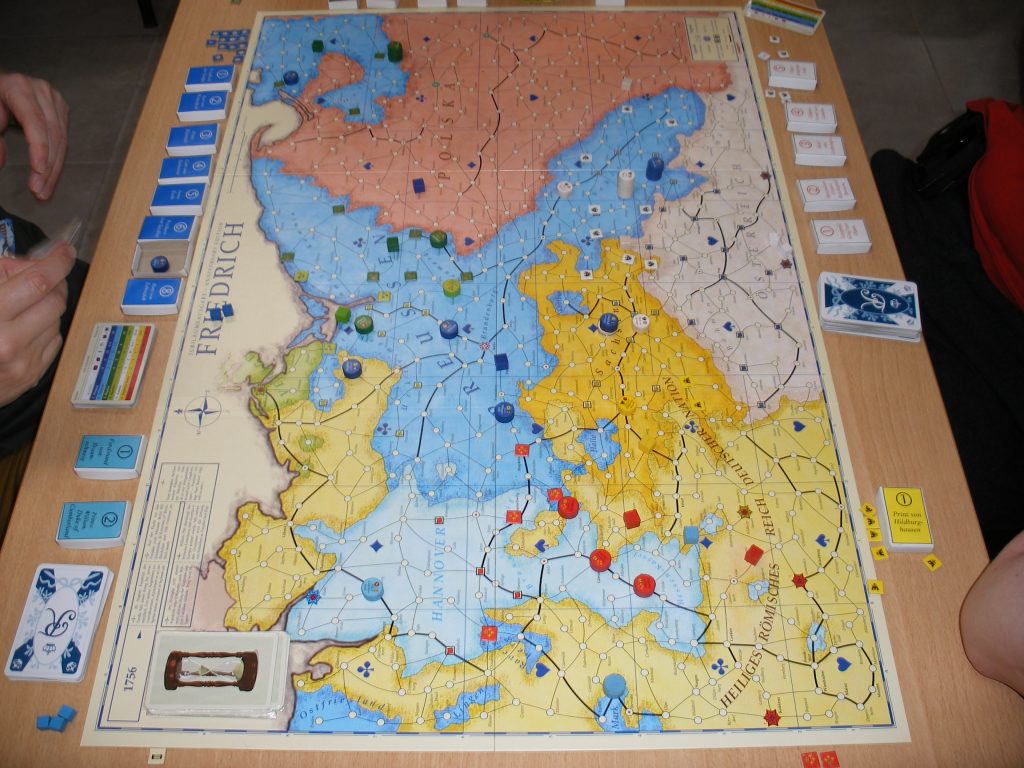
Final del turno 10. Fermor (R2) ha eliminado de enmedio a Seydlitz, que era todo lo que se interponía entre la pieza sueca y su último objetivo primario en Malchin. Sin embargo, la sopresa viene por el sur, dónde Bjorn inicia un avance en Silesia que ahora pasamos a examinar más a fondo.
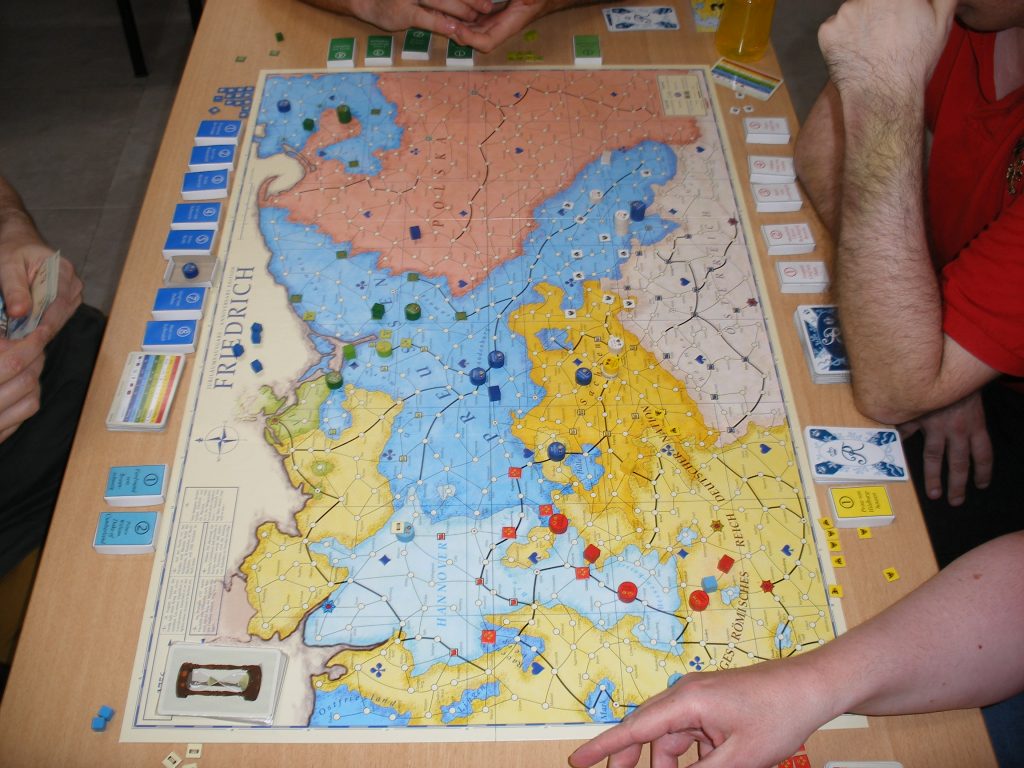
Turno 10, tras muchos turnos de vacilación que hacían pensar que su mano era muy débil en diamantes, Bjorn ataca a Schwerin y Keith (P4 y P5) en Silesia con su pila formada por Daun, Laudon, y Lacy (A1, A4, y A5).
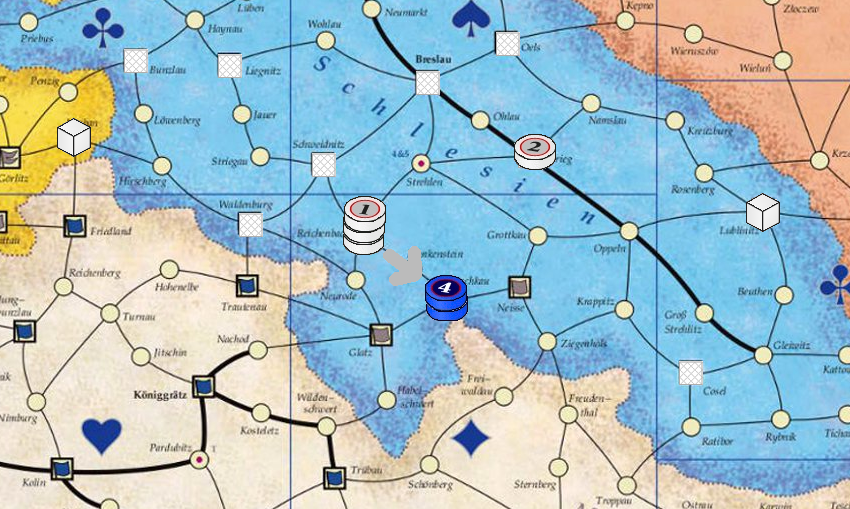
Contrariamente a lo esperado, la mano de Bjorn en diamantes resulta ser mayor que la de Guy. Tras intercambiar muchas cartas los prusianos emplean su ultima reserva en hacer una corta retirada hacía Glatz.
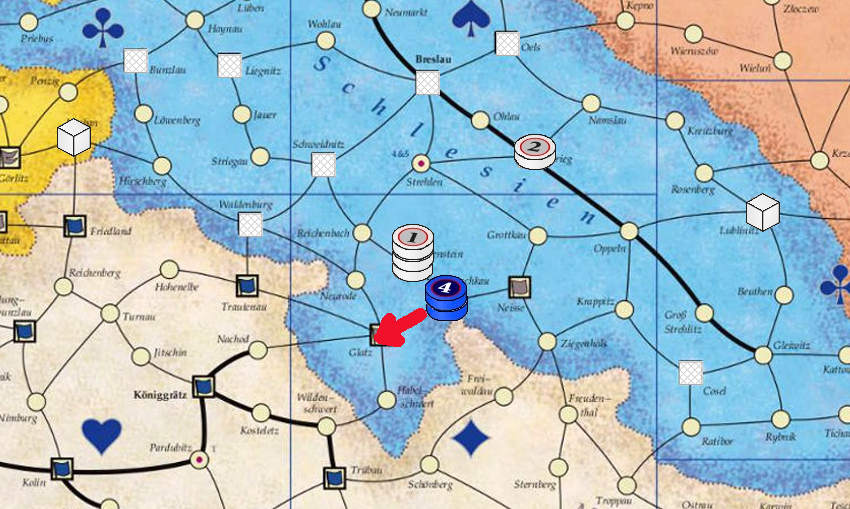
Turno 11. Siendole imposible mantenerse en diamantes por más tiempo, y necesitando las picas para combatir contra Rusia, Guy mueve sus piezas a la pequeña esquina prusiana en corazones en Waldenburg.
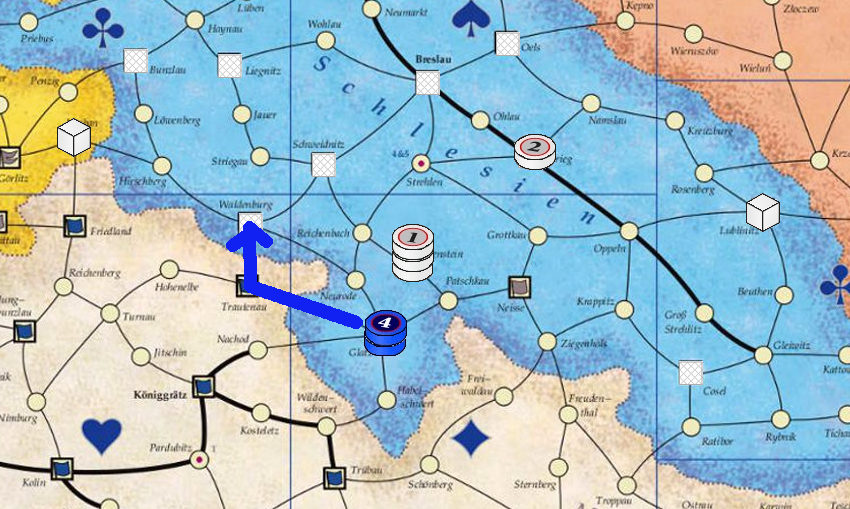
Lo que Guy no vió fue la complicada secuencia de movimientos por la cual Bjorn iba a conseguir cercarle su ejército en Silesia, empleando incluso un tren de suministros austríaco.
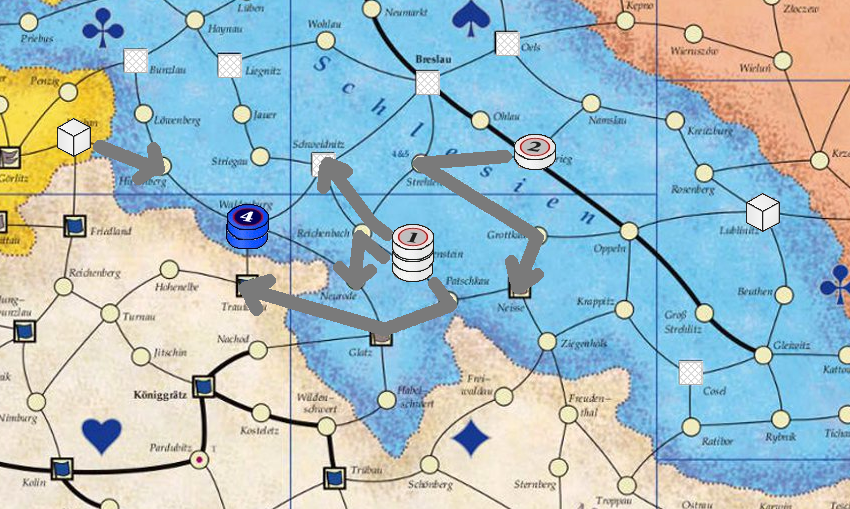
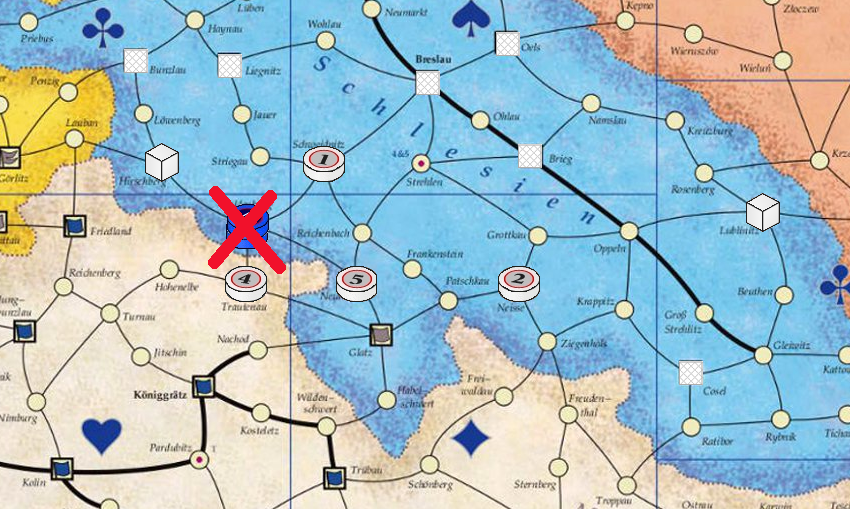
Tras este último mazazo, a Prusia tan sólo le queda morir. La zarina muere al acaba el turno 12 y un último intento de detener a los suecos de conquistar Malchin y ganar la partida en el turno 13 fracasa ante la pobreza de cartas prusiana. La única honra que puede salvar Guy es la de haber impedido una doble derrota negando de manera insistente Radeburg a Bjorn y sus austríacos.
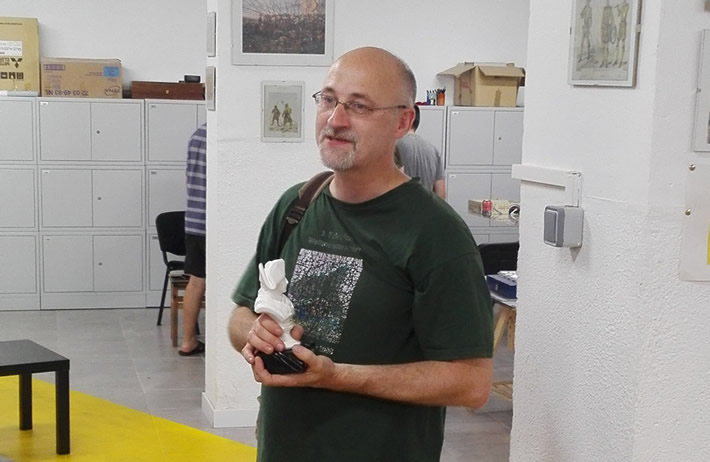
¡Richard Sivél gana el CAFE 2017!
Análisis final
Para el resultado final de esta partida fue decisiva la maniobra de cerco que Guy intentó en el turno 4 y que tuvo un resultado catastrófico para Prusia. Aunque le hubiera sido posible mantenerse en el sector de picas contra Rusia y Suecia, la partida estaba vuelta contra Guy desde ese momento porque ese era el palo que eventualmente hubiera necesitado contra Bjorn (Austria) en Silesia. Es bastante posible que si Bjorn hubiera advertido esto antes, hubiera podido ganar la partida con Austria. Tan sólo cabe concluir la reflexión con el lema de los Commandos en la Segunda Guerra Mundial: “Who dares, wins”. Quien se atreve, gana.
El cerco de las piezas del contrincante es una de esas maniobras que ofrece simultáneamente grandes oportunidades y amenaza con serios riesgos. Antes de llevar una a cabo hay que valorar tres cosas. Primero cuán seguros estamos de poder llevarla a cabo.
En caso de duda, no hacerlo. Segundo, que coste tiene en términos de cartas para el que la inicia. Y tercero, qué ganamos cercando al enemigo y destruyendolo totalmente. La ganancia es siempre mayor para los aliados que para prusianos, y para estos es más beneficioso la destrucción de las piezas enemigas en los turnos finales de la partida que al comienzo, puesto que al inicio de la partida tienen tiempo para retornar al campo de batalla.
Sunday afternoon, June the 18th, top qualifier, Guy Atkinson, opts to play as Prussia in the Final.
Right afterwards second-qualified Bjorn von Knorring, seats himself opposite Guy, and will thus play as Austria.
Then Richard Sivél takes his seat on the Russian side of the table, after reaching the third place in the heats.
And closing the table Maurice de Wijs, as fourth qualified, is left to play as France.
The situation at the end of the 2nd round. Heinrich (P3) has gone northward from Berlin and is close enough to join forces with Dohna (P7), which we will see happening in the 3rd round. Before them Russia is making a direct advance in Kammin as well as in East Prussia. In Silesia Daun and Laudon (A1 and A4) have just made a probe on Schwerin and Keith (P4 and P5) in diamonds, and retreated after a brief exchange of cards. The rest of the Austrian pieces are advancing on a broad front in the area between Silesia and Saxony, while Hildburghausen must fend for himself against Winterfeldt (P2) and has been driven to the southern map edge. France makes a straightforward advance northwards along the two main roads, but in doing so leaves a gap for Cumberland (H2) to slip southwards and set up one of the cornerstones for a “Triangle Defense”. In the next round Maurice (France) will counter this move by joining all french generals at Soubise’s (F2) present location and will initiate a general chase of the southernmost Hanoverian piece.
At this time a series of moves by Guy (Prussia) and Richard (Russia) is begun, which will mark the course of this game and which we will see with greater detail
Beginning of the 3rd round, end of the Prussian move. Heinrich and Dohna join forces in Stargard to face the Russian invasion.
Russian move in the 3rd round. Saltikov and Fermor (R1 and R2) join at Wangerin to attack the Prussians, while attempting to conquer Neu Stettin and Waldenburg.
In the ensuing battle there is a brief exchange of club cards but, as soon as a -2 retreat is offered to him Richard accepts this battle result. To his consternation, Guy retreats the Russian pieces to a location (Regenwalde) where they can be easily surrounded by the Prussians in the coming round.
Russian fears are realized in the Prussian 4th round, as Guy moves Heinrich (P3) to Naugard and Dohna (P7) to Schivelbein to encircle the invading Russians. The decisive battle of the Final is about to begin!
Unfortunately for Guy, this battle doesn’t have the result he expected from it. The attack is initiated by Dohna (P7) with 8 troops against 10-11 Russians. At this time I was able to peek at Guy’s hand, and only had three club cards left – two elevens and a four. In his first three hands, out of twelve cards, Richard had drawn five high club cards and a reserve. As a result Dohna lost the battle and had to retreat by three, leaving him in the clubs sector, while Heinrich (P3), with just one troop, was eliminated. Disaster!
In the Russian 4th round Richard completes the Prussian defeat by attacking Dohna at Arnswalde with his 10-11 troops. Dohna has just 5 troops left, and Guy has spent all of his club cards in the previous battle, and he had no reserves either, and thus is unable to prevent Dohna from being taken off the board.
General view at the end of the 4th round. After the débâcle in Cammin, there is an emptiness of blue pieces in the northern half of the board (the left hand side of the picture) whose most alarming consequence is that nothing can keep Sweden from taking its primary objectives by the 6th round, right when the first card of fate is to be read. It could announce the death of Elisabeth and the end of the game with a Swedish (Richard’s) victory! In East Prussia (left upper corner in the picture) Lehwaldt (P8) is still on the board, in spite of the Russian conquest of all objectives there. In Silesia, Schwerin and Keith (P4 and P5) are sitting on Breslau in the spades sector. In Saxony Prussia still has predominance. In Hanover, Soubise and Chevert (F2 and F3) are on the hunt for Cumberland (H2) while Richelieu (F1) enters Saxony going after the Hanoverian supply train. Seydlitz (P6) keeps a watch on Magdeburg.
This picture at the end of the 5th round shows Guy’s reaction to his unexpected defeat on the previous round. Lehwaldt (P8) has attacked and destroyed Apraxin (R3) in the spades sector in East Prussia. Heinrich and Dohan (P3 and P7) reappear in Berlin, and Seydlitz (P6) leaves his watch over Magdeburg and heads northwards to try to retake one of the Swedish objectives. With far greater importance for the future, Schwerin and Keith (P4 and P5) have changed their location in Silesia, which they now defend from the diamond sector.
End of the 9th round. The Tsarina is still alive and Guy has been fighting heavily against Richard in spades as well as in hearts. Against Russia as well as against Sweden. This picture holds a crucial moment in the game, for it is right at this time when Sweden has managed to clear a path to retake its primary objectives. Russian pieces are positioned in a way to support their minor ally. Elsewhere on the board, there has been some fighting between Austria and Prussia in Saxony, but everything stays quiet in Silesia. It seems the Austrian triple stack doesn’t dare to enter the diamond sector there, as if Bjorn had few diamond cards. In the west, France (Maurice) has profited from the general chaos and has snatched Magdeburg and Halberstadt away from the Prussians.
End of the 10th round. Fermor (R2) has eliminated Seydlitz (P6), the only Prussian general between the Swedes and their last primary objective at Malchin. Nevertheless, the surprise this round happens in Silesia, where Bjorn has started an advance with the Austrians, which we will look now more closely.
Round 11. After several rounds of vacillation which made everyone believe his hand was weak in diamonds, Bjorn attacks Schwerin and Keith (P4 and P5) in Silesia with a triple stack formed by Daun, Laudon, and Lacy (A1, A4, and A5). 24 Austrian troops against 16 Prussian troops.
Once more unexpectedly, Bjorn’s diamond hand is bigger than Guy’s. After a hefty exchange of many diamond cards, the Prussians spend their last reserve to achieve a -1 retreat to Glatz.
Round 12. Unable to hold his own in diamonds any longer, and needing the spades against Russia, Guy moves his generals to Waldenburg, a small piece of Prussian territory in the heart sectors.
What Guy didn’t see was the convoluted move sequence which Bjorn used to encircle the Prussian generals in Silesia. Even the supply train was used to achieve this encirclement.
After this last defeat, Prussia had absolutely no chance to win the game. Elisabeth dies at the end of round 12, and a last ditch attempt in round 13 to keep the Swedes from taking Malchin and winning the game fails due to the lack of cards in the Prussian hand. Guy still manages to hold on to Radeberg in Saxony for one more round and thus spare himself a double defeat by both Richard and Bjorn.
Richard Sivél wins the CAFE 2017!
Análisis final
Final Analysis.
The encirclement manoeuvre Guy tried on the 4th round and which failed so miserably was decisive for the outcome of this game. Had he even been able to hold in spades against Russia and Sweden, the game was going to turn against Guy eventually as it was precisely the spades the suit he needed to defend against Bjorn (Austria) in Silesia. It is quite possible that, had Bjorn noticed this earlier, he could have won the game with Austria. As the saying goes: “Who dares, wins”.
Encirclement of enemy pieces in Friedrich is one of those manoeuvres which offer both great opportunities and serious risks. Before committing to an encirclement battle, three things have to be carefully considered. First, you have to be very confident on your card superiority in the corresponding suit. In case of doubt, just don’t do it. Secondly, the expense in cards of the encirclement fight has to be evaluated. Always assume the fight is going to be fierce and many cards are to be expended by both sides. Thirdly, you have to evaluate what do you achieve by encircling and destroying the enemy pieces. The benefits of a successful encirclement are always greater for the Allies than for the Prussians, and for Prussia the destruction of enemy pieces in the final rounds of the game is more valuable than in the first rounds, because in the initial rounds the destroyed pieces still have time to return to the field of battle.